

Tobias Paul was allowed to do thatEF-P10 RGB Pocket LED Light and theEFT-8C RGB Tube Light test in practice. In the past he has worked with the EFT-360 RGB tube light and the JR-70 RGB pocket lights. First things first: the models are in no way inferior to their predecessors. Having already worked with the EFT-360 RGB tube light and the JR-70 RGB pocket light, he was particularly curious to see how the new ones would fare compact lights would beat in action. Also the new ones steady lights could him immediately with the extreme compactness convince. The light output leaves nothing to be desired and gets through auto modes added. The photographer particularly emphasizes that the EFT-8C RGB Tube Light not only ideal for a shoot because of the light source, but also perfect as a result of its shape "accessory" in a Integrate recording leaves.
But enough of the technical data, let's get to what probably interests most: The practical use . Here the photographer makes one thing clear: „ i love working with colorful lights and the possibilities you can with thatRGB pocket light and theRGB tube light has are incredibly versatile. All my setups can be realized with a tube and a pocket light as well as with two pocket or tube lights." Important next to the Distance of the lights to the model is also the color intensity and brightness . It takes a little finesse to find the right mix here, but with enough practice it's not a problem. It is important to remember that it is better to under-expose than over-expose.
At the shootings came next to theEF-P10 RGB Pocket LED Light and theEFT-8C RGB Tube Light, theEFT-360 RGB Bar Light and the JR-70RGB no other light sources used. The photos were taken with a Canon EOS R5 and a 5D Mark IV.
Setup 1: Tongs Light
That probably easiest setup for a certain wow effect: Place one of the two lights on the right and one on the left of the model, both lights should be approx 45 to 80 degrees aligned to the side of the model. As far as the distance to the model is concerned, the hue be respected. Some colors are a little more dominant and some a little weaker in interaction with other colors. If one of the colors is too dominant, you can move the light a little further away from the model and also change the angle.
A little Photographer's tip : "During the shoot I would recommend you to "Live View" to use your camera and to position the model with precise instructions in such a way that the light edges, i.e. the meeting of the two colors, are exactly where they should be."
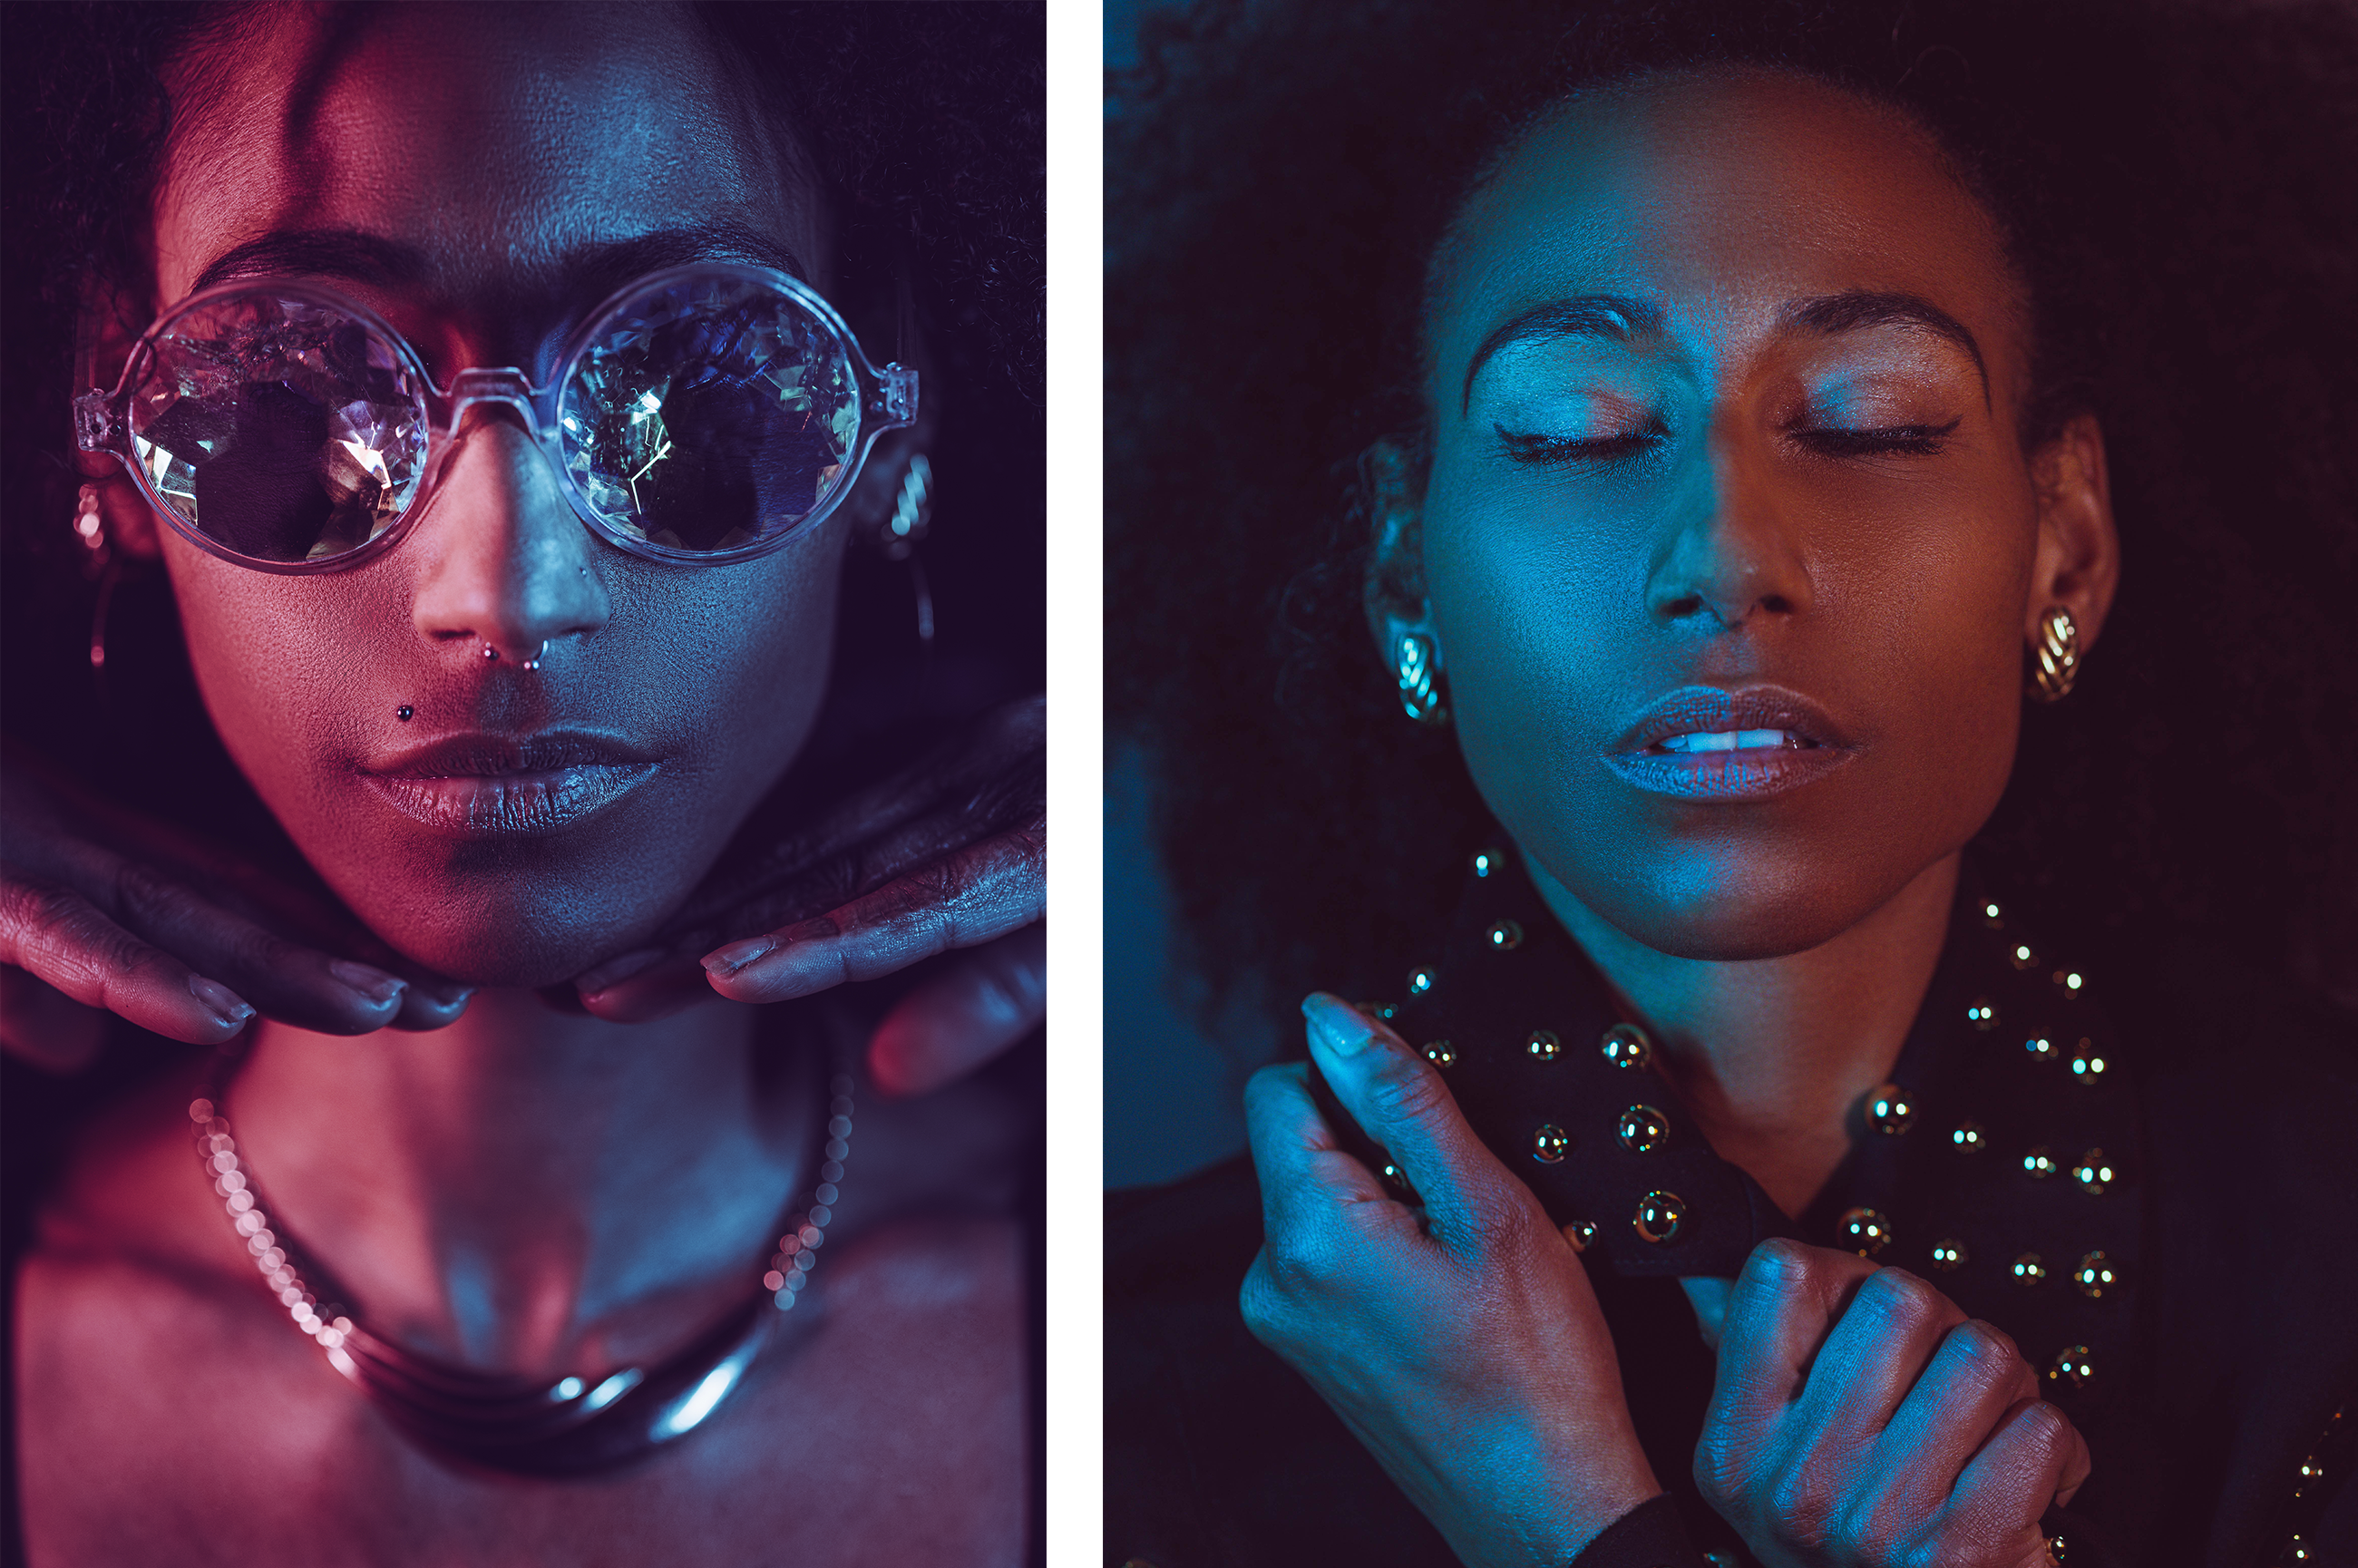
With this great result from model Melanie, Tobias Paul has the Colors red and purple selected and the lights, as mentioned above, placed on the right and left of the model. In the right picture, the LED steady lights each in the colors Blue and red set to create a cooler look on the model's face. In both images, care was taken to ensure that the light edges each in the center of the face.
Setup 2: Combined light
In the second set an old advertising sign was used in addition to the Pocket and the Tube Light. This was used to illuminate the face Tube Light on a tripod in front of the model and that Pocket Light diagonally behind the model placed.
To give the picture additional excitement, the advertising sign was placed under the model and her head was aligned in such a way that the writing is reflected in the sunglasses. The interplay creates an exciting and harmonious picture ‒ also interesting as Close up , as seen in the right picture.

Setup 3: One color
Next to the interaction of two different shades the two lights can also be used perfectly to illuminate a motif in one colour. By the low weight and the handiness you can easily hold one of the two lights in your hand while the other is attached to a tripod. Paul has this herePocket light placed on a tripod about one meter in front of the model in order to illuminate the entire setup with some colored light. With theTube Light in the hand he also specifically illuminated the places where more light accents should be set. In this way, the light could be controlled easily and quickly.

Setup 4: Outdoors by Night
As mentioned, the lights are relatively small and compact , so they are not only suitable for indoor , for .... As well outdoor shots . Especially at night you can achieve great results with special effects. All it takes is one interesting concept . Adjust light, choose color and let's go!
At the pictures "outdoor by night" used Paul again two steady lights . In the first picture, thanks to the first continuous light, the smoke in scene set. You can also see the shimmer on the model's face through the continuous light. Also around the background mood of the picture to adapt, the second permanent light was placed to that effect.
The second picture also shows the use of two different colored continuous lights . The first permanent light was called background light used to highlight the silhouette of the model in color. Another permanent light was used from the front, which the cool coloring visible in the model's face.

Setup 5: Smoke
A super way to start working with colorful light To make it even more interesting is to combine it with smoke. For this, Tobias Paul worked with e-cigarettes or a smoke machine, for example. It's important that the two lights are placed correctly. Paul placed the first light in such a way that it shines on the model from the front and the second should be slightly to the side from behind and thus behind the smoke. This illuminates the smoke and makes it as visible as possible in the image.

If you too creative lighting methods If you have tried it, please tag usInstagram andFacebook with the hashtag #jinbeiphotobox . We look forward to your results!


